Showing posts with label tips and tricks. Show all posts

Moving Towards a Better Use of Gmail [part3]

By now, you guys should have mastered some keyboard shortcuts. Some of you probably created a few filters and labels(I doubt it). Today I was setting up a few things for my upcoming trip to Boston(Celtics and Patriots pride baby!!!) and I remembered a very important gmail feature that most of you probably don't know about: the Vacation Responder.

When you are going on vacation and will not be accessing your email, you don't need a secretary to reply to them, you need vacation responder.
To create a vacation responder, click on “Settings” at the very top of the page on the right-hand side. Scroll down until you see the section entitled “Vacation responder”. Click on “Vacation responder on”. Next, type a custom message in the boxes provided to let others know that you are away on vacation. In your message, you may want to include when you will be back so they can get a better idea of when they can expect a response from you. Then click "Save Changes" at the bottom of the page.
Now you can go away and not have to worry about that Employer trying to reach you for a position, or that client that needs your help ASAP.

I also wanted to talk about the search bar today. I was helping a lady out the other day with an attachment she was trying to send out. She was looking for an old email but instead of searching for it through gmail's search form, she was going page by page looking for something sent to her last year!

I stopped her and asked:
"You know that you can search for an email by typing some of it's credentials in the search form right?"
She looked at me like I was speaking Portuguese and said no.
Im guessing that most of you are in the same boat so I am going over a few examples:
  1. Let's say you get messages from john on a regular but your looking for a specific message that has a recipe in it. Goto the search bar and enter: "from: john has: recipe"
  2. You need an email that you recieved between february and march 2007. Goto the search bar enter: "after:2007/02/01 before:2007/03/01"
  3. You can get an email by just typing one of the words that were in the email. You're looking for the message you got that contains your insurance information. Just type "insurance" in the search bar and you will get a list of messages that match the criteria.
  4. You can even pulll up all the emails from a specific email address. Just type "from: jojo55447@gmail.com" and you will get all the emails you've ever recieved from him.
Hopefully you understand now how easy it is to use the search bar. Give it try, leave me a message if you have a question. If your query has no results just add more criteria or approach it from another angle. See you guys next time.


Must-Have Windows Mobile Apps List

If you own a Windows Mobile Device you have to check lifehacker's article. There is no way you won't find something in there. Make sure you read the comments, they have more sites and apps too!


How to Add Your Miro Content to Boxee

If you use Miro as your TiVo for Internet Video and the previously mentioned Boxee, read on.
I have Miro installed on my Mac Mini and I've been using it for a while now. Miro has a lot of video content and the coolest factor(for me) is that you can create dynamic, keyword-based channels. For example: I have a YouTube channel with the keywords: fc barcelona, football, soccer. I can navigate to that channel and download the videos that I wish to watch. The cool part is that from the moment the channel is set, Miro will automatically download new uploaded videos that match my keywords. I can watch them, delete them or let Miro delete them after a "user-defined" amount of days.
Anyways, I got Boxee setup like two weeks ago on my linux-based laptop and I'm in love. I realized that there was no need to watch my vids on Miro anymore if I was able to get Boxee to grab them. This is obviously easier if your Miro setup is on the same machine as your Boxee. But if it isn't, this is what you do:
Make sure the computer running Miro has sharing enabled.
Make sure the folder with the Miro content is being shared.

In Boxee: Goto Video-->My Videos-->Network Sources-->Add New Source
If your machine is not listed, then enter the ip address manually. Make sure you specify username and password if that's needed to access your shares. Once you are able to get in, select the appropriate folder, name it and select update.

Here is what the process will look like in Boxee:


Moving Towards a Better Use of Gmail [part2]

Im back, as promised, and this time I will teach you about Filters and Labels. I also want to remind everyone that this is not the only way of setting these things up. If you need or have a different approach, you can leave a comment or link for the readers. The screenshots are a little small so if you really want to see what is going on, you can click on them and you will be directed to the full screen version.

I am going to use a sample mailbox that I've setup a while ago to catch my spam and random subscriptions. Here is what it looks like before we start:


Now I want to add a label to all the messages from TechRepublic.
-First I select the messages that I want to label( I end up missing some but I'm just using it as an example so don't freak out)
-Then I create a label by clicking on the More Actions drop down menu and choosing New Label. Click here for the video demonstration.
Unfortunately there are a few limitations to this method:
1 You have to manually pick the emails you want labeled.
2
You would have to repeat the process every time you get new email.

If this is fine for what you want to do, so be it. For anyone else who thinks this would not be the best setup, I present to you: Filters.

Filters can do a whole lot more than just selecting your messages and labeling them. You can set filters to forward your filtered email, to delete them, to mark them as unread, to star them, to archive them and even arrange that they are never sent to your spam folder.

Ok so let's create a filter that will:
-Label messages from kayak.com
-Skip the inbox(only applies to future messages). That way I don't have to see them when I login. And I can click on the Kayak label anytime I feel like checking flight discounts instead.
Click on the Create a filter link next to the Search the web button:


Next we set the criteria. I entered kayak.com both in the From field and in the Has the words field. Then I clicked on Test Search to see which messages would have been filtered using my criteria.


If the results aren't picking up everything you want, try to add more criteria. When you are satisfied with the results, you can click Next Step.

Next we decide what to do with our filtered messages.
As you will see in the image below, I chose:
  • Skip the Inbox (this only applies to future messages)
  • Apply the Label (Kayak, you can actually create a label right from the drop down menu)
  • Apply filter to the 33 conversations below(to make sure the previous messages get labeled too)


Then I click on Create filter and my filter has been created. The screen that follows allows you to edit, delete, or create new filters. You can access that page anytime by clicking on the settings link in the top right corner, then selecting the filters tab.

If you guys have any questions or comments just leave me a note. If you need to email me, my email is raphsabb+blog [at] gmail. See you next time.


Quick and Easy Way To Make Your Photo's Look Ancient


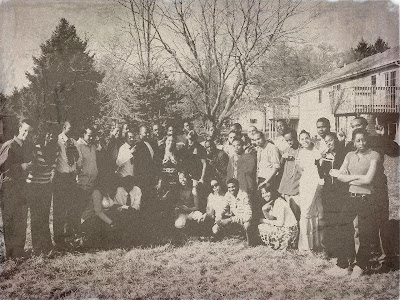
If you don't have photoshop skills(even if you do), making a photo look old is not necessarily easy nor quick. That's not a problem anymore thanks to The Wanokoto Labs website. You can either upload an image to the site from your computer or point it to an image URL online, then just click Convert. After a few seconds, you get an old-school style version of the picture(just like the one I used above). To save your new image, right click on it and select "save image as..." and you can download it right to your computer. Voila!!


UPDATE!! You can also check the original picture I used if you click on the thumbnail above.


The Wanokoto Labs [taken from lifehacker]


Moving Towards a Better Use of Gmail [part 1]

I have plenty of friends on gmail but most of them know nothing when it comes to gmail's feature-rich and powerful interface. So I will attempt, once or twice a week, to change that horrible fact. If you don't have a gmail account yet, please go get one right now!

I will be gathering my information from personal experiences, various articles and such found on the web (there's plenty). If something does not work, just leave a comment and we well try to figure it out together. If you know about a cool trick and want to share it, don't be affraid to leave a comment or an email.

Part 1: Navigation
Navigating through gmail is pretty easy with a mouse. But did you know that it is not only easy, but also faster with the keyboard?
Don't take my word for it though. Try it out for yourself and let me know.

To turn the shortcuts on:
Goto your settings tab in gmail, then locate keyboard shortcuts. Turn them on, go to the bottom of the page and hit save.

I have an embedded list of gmail shortcuts for you down below. Print it or Save it and try out a few things. Click here for a direct link to the document.


Let me know how it works for you.


Cron job to run a weekly Update & Upgrade

I've been running my own Linux server for a while and since there is no graphical interface, you don't really get a reminder to upgrade the system. Here is a link to a few methods describing how to get this done:AutoWeeklyUpdateHowto

Let me know if this works for you guys.


Update!!

I modified the script a little. I find that after some updates the server needs to be rebooted, so I just added the command to the script. Mine looks like this:

#!/bin/bash
apt-get update; apt-get upgrade -y; apt-get autoclean; shutdown -r now